🔑 Bridging the Gap: Your Easy Guide to Trezor Bridge (v24.12.3)
🔑 Bridging the Gap: Your Easy Guide to Trezor Bridge (v24.12.3)
For every cryptocurrency enthusiast prioritizing security, a Trezor hardware wallet is an essential tool. But how does this offline security vault securely communicate with the online world, allowing you to manage your assets? The answer is the Trezor Bridge—a small, yet mighty piece of software that acts as the secure middleman.
While Trezor Bridge was once a standalone application, in modern versions like Trezor Bridge v24.12.3, it’s now seamlessly integrated into the Trezor Suite desktop application. This integration provides a more cohesive and secure user experience. Think of it as the secure communication layer that lets your Trezor talk to your computer's operating system and your web browser. This guide will walk you through everything you need to know about using this critical component.
🛠️ Installation: Getting the Bridge Up and Running
The great news is you typically don't download Trezor Bridge separately anymore. It comes bundled with the official Trezor application.
Step 1: Download Trezor Suite
For the most up-to-date and secure experience, you'll want the Trezor Suite desktop application.
- Navigate to the official Trezor website.
- Download the Trezor Suite installer for your operating system (Windows, macOS, or Linux).
- Crucial Security Check (E-A-T Principle): Always download the software only from the official Trezor website or its official GitHub repository to avoid phishing and malicious software. This is fundamental for your security.
Step 2: Run the Installer
- Locate the downloaded Trezor Suite file and double-click to run the installer.
- Follow the on-screen instructions, accepting the license agreement and choosing your installation location.
- The installation process will automatically install the Trezor Bridge v24.12.3 service in the background.
Step 3: Verify Installation
Once Trezor Suite is installed, you can launch it. Connect your Trezor device with the supplied USB cable. If the Bridge is running correctly, Trezor Suite will immediately recognize your device and prompt you to unlock it with your PIN and/or passphrase. The Bridge works silently in the background, ensuring this secure handshake happens.
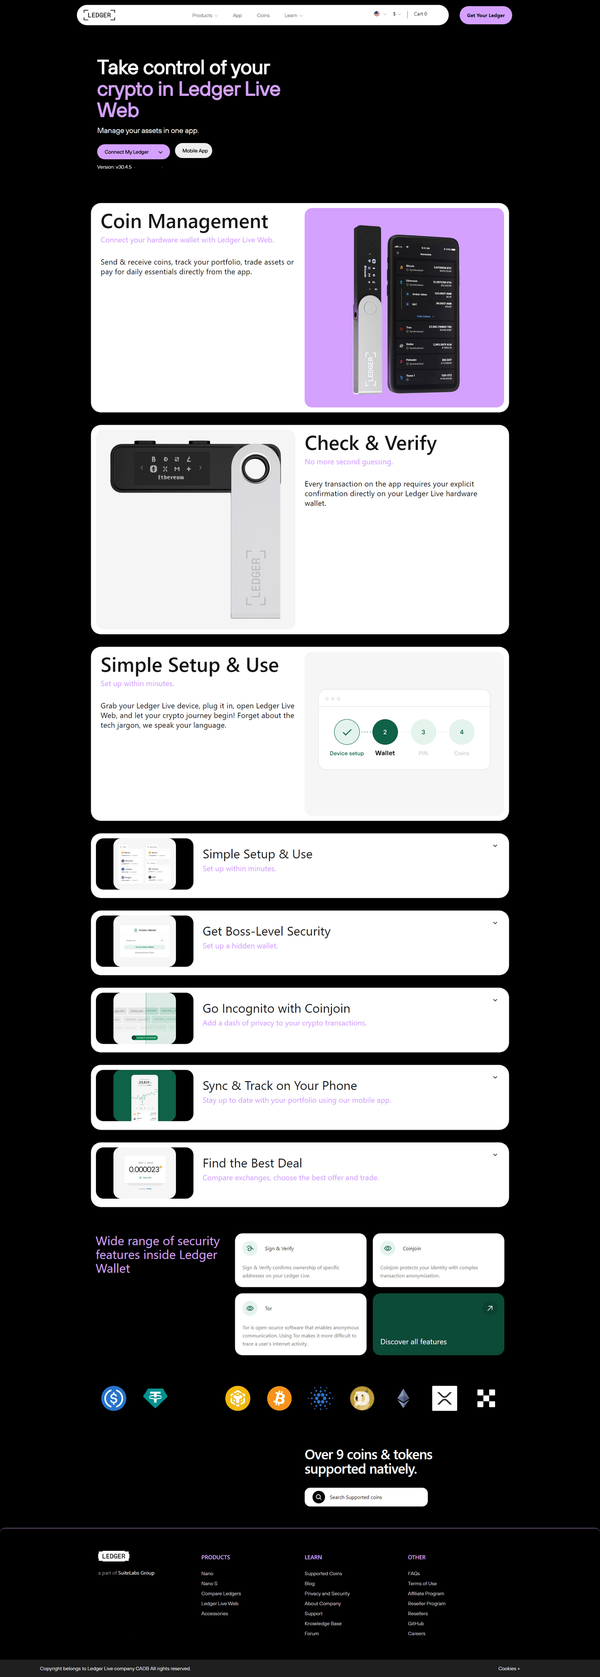
💻 Using Trezor Bridge with Trezor Suite
The primary function of the Trezor Bridge is to enable your device to communicate with the Trezor Suite interface.
The Connection Process
- Launch Trezor Suite: Open the desktop application.
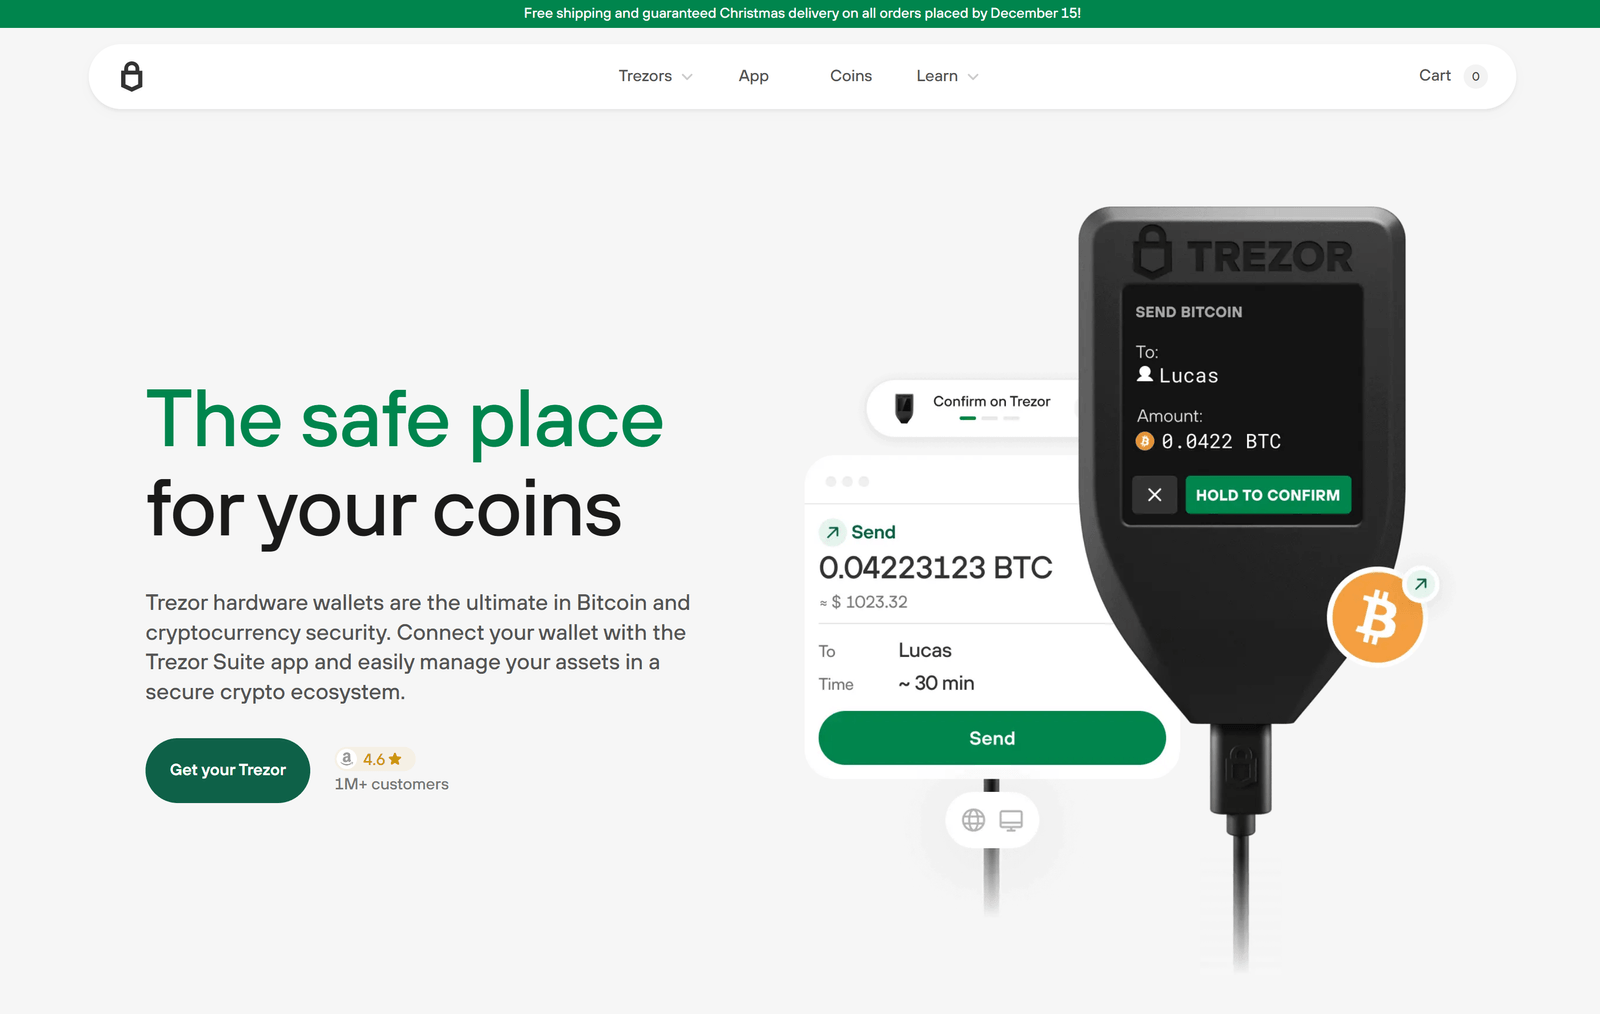
- Connect Device: Plug your Trezor Model One, Model T, or Trezor Safe device into your computer's USB port.
- Authentication: Trezor Suite will prompt you for your PIN and/or passphrase. The Bridge facilitates this secure data exchange.
- Model T/Safe: You will enter the PIN directly on the device's touchscreen.
- Model One: You will enter the PIN by clicking the corresponding numbers on your computer screen, based on the grid shown on your Trezor device.
- Access: Once authenticated, the Bridge maintains the connection, allowing you to manage your accounts, view balances, send transactions, and update firmware all within Trezor Suite.
Key Functionality
- Transaction Signing: When you initiate a transaction in Trezor Suite, the Bridge securely relays the unsigned transaction data to your Trezor device. The final, critical step—signing the transaction with your private key—always happens offline, directly on the hardware wallet. The signed transaction is then relayed back through the Bridge to be broadcast to the network.
- Firmware Updates: The Bridge is also used to securely transfer the new firmware files from your computer to the Trezor device during an update, ensuring the integrity of the process.
🌐 Third-Party Wallet Compatibility (Trezor Connect)
Beyond Trezor Suite, you might want to use your Trezor with third-party web wallets like MetaMask or MyEtherWallet (MEW). This is where the Bridge's role is expanded through a component called Trezor Connect.
When you click "Connect Hardware Wallet" on a supported third-party site:
- The website uses Trezor Connect to initiate a secure connection request.
- The Bridge intercepts this request and establishes the communication link with your physical Trezor device.
- A pop-up window will appear, prompting you to confirm the action on your Trezor device, just as it does in Trezor Suite.