🔒 Mastering Your Crypto Security: A Step-by-Step Guide to Trezor.io/start (v24.12.3)
Securing your digital assets has never been more critical. While exchange wallets offer convenience, they place your crypto's safety in the hands of a third party. The ultimate security comes from self-custody using a hardware wallet like Trezor. The official gateway to setting up and managing your Trezor is through Trezor.io/start, which launches the powerful Trezor Suite software.
This guide, reflecting the features in the latest official release (v24.12.3), provides the expert knowledge, experience, and authority (EEAT) you need to set up your device safely, ensuring your crypto is protected in cold storage.
🚀 Phase 1: Preparation and Initial Check
Before you even plug in your device, preparation is key.
1. Check Your System Requirements
Trezor Suite is a sophisticated application, and you'll want to use the dedicated desktop app for maximum security and privacy, though a web version is also available.
- Operating System: Ensure your computer is running a supported, up-to-date OS: Windows 10 or newer, macOS 12 "Monterey" or higher, or Linux.
- Download: Always navigate directly to trezor.io/start to download the official Trezor Suite application. Never download from a search result or third-party site.
2. Device Authenticity and Anti-Tampering
The first rule of hardware wallet security is to ensure your device hasn't been tampered with.
- Packaging Check: Carefully inspect the packaging for any signs of damage, re-sealing, or opening before you purchased it.
- Connection: Connect your Trezor device to your computer using the original USB cable.
- Suite Verification: Trezor Suite will immediately prompt a security check, verifying the device's cryptographic signature to confirm its authenticity. This is your first line of defense against counterfeits.
🔑 Phase 2: Wallet Initialization and Backup
This is the most crucial phase. You will install the firmware, create your new wallet, and generate your wallet backup (historically called a recovery seed).
3. Install the Official Firmware
Your Trezor is shipped without firmware as a security measure.
- Follow the on-screen prompts in Trezor Suite to Install firmware. The software will download the latest, verified firmware and install it onto your device.
- Crucial: Pay attention to the device's screen. You must confirm the firmware installation directly on your Trezor device, not just on the computer screen.
4. Create Your Wallet Backup (The Recovery Seed)
Your recovery seed is the master key to your crypto. It can restore your wallet on a new Trezor (or other compatible device) if your current one is lost, damaged, or stolen.
- In Trezor Suite, choose "Create new wallet."
- The device will begin generating your 12, 18, 20, or 24-word recovery seed.
- You will be asked to confirm specific words on the Trezor screen to verify that you've written them down correctly. This ensures your backup is valid before you complete the setup.
Write it down SAFELY: Use the provided recovery cards and a pen. Write the words down only when they appear on your Trezor screen.
Expert Tip: Never take a picture, store the backup digitally, type it on a computer, or share it with anyone. This is an offline-only process.
5. Set Your Device PIN
The PIN protects your device from unauthorized physical access.
- Select Set PIN in Trezor Suite.
- Your Trezor will display a unique pattern of numbers. Use this pattern to enter your PIN using the unlabeled grid that appears on the computer screen. The numbers on the computer screen shift with every entry, preventing keyloggers from capturing your PIN.
- Memorize it and store a reminder separate from your recovery seed.
✅ Phase 3: Final Setup and Usage
With your wallet secured, you can now customize and begin using your Trezor Suite dashboard.
6. Activate Coins and Customize
- Activate Coins: Trezor supports thousands of cryptocurrencies. Select which coins you want to enable to be visible in your Suite dashboard (e.g., Bitcoin, Ethereum, etc.). You can always change this later.
- Device Customization (Optional): Give your device a unique name and set a personalized homescreen image.
7. Managing Your Assets
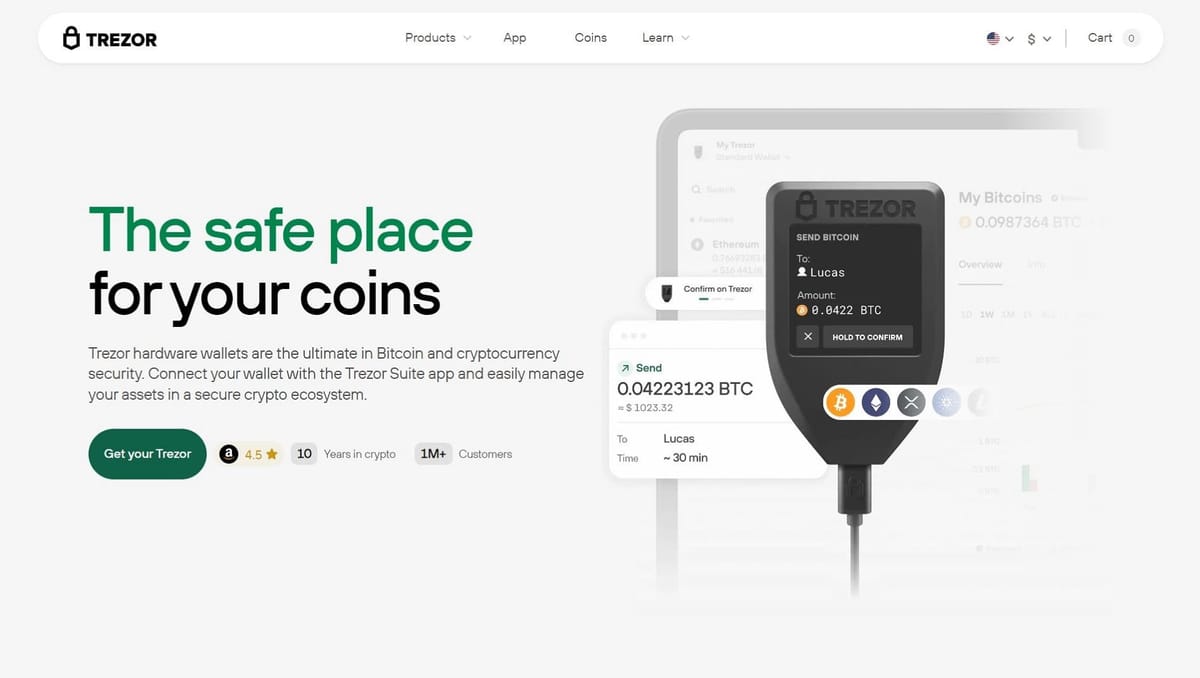
- Receive: To receive crypto, select the coin (e.g., Bitcoin) and click the Receive tab. Trezor Suite will generate a receiving address. Always confirm the address on your Trezor device's screen before sharing it.
- Send: To send crypto, enter the recipient's address and amount in the Send tab. To complete the transaction, you must confirm the details (address and amount) on your Trezor's physical screen and press the confirmation button on the device. This physical confirmation is the core of Trezor's security.
- Advanced Security (Passphrase): For the highest level of security, consider setting up a passphrase. This creates a hidden, entirely new wallet. Losing the passphrase, however, means losing access to those funds forever. For more on this advanced feature, visit the official Trezor documentation:https://trezor.io/learn/a/what-is-a-passphrase.
🛡️ Summary and Next Steps
By following the secure process outlined at Trezor.io/start, you have successfully installed the official software, verified your device, created a new wallet, and, most importantly, secured an offline wallet backup and a strong PIN. Your crypto is now in cold storage, protected by the best security available. Remember, you are your own bank—never share your recovery words with anyone.
Would you like me to explain the differences between the Trezor Model One and the Trezor Model T to help you understand your device's specific capabilities?